
how to cook steak medium rare perfect usually comes down to one thing: temperature control, not guesswork, not “minutes per side” you saw once on a reel.
If you’ve ever cut in too early and watched juices run, or ended up with a gray band and a warm red center, you’re not alone, medium rare is simple in concept and fussy in execution.
This guide walks through the two most reliable home methods, pan-sear and grill, plus the thermometer targets, carryover cooking, resting, and the little details that quietly decide whether your steak tastes like a steakhouse or like “pretty good.”
What “medium rare” actually means (and why it’s easy to miss)
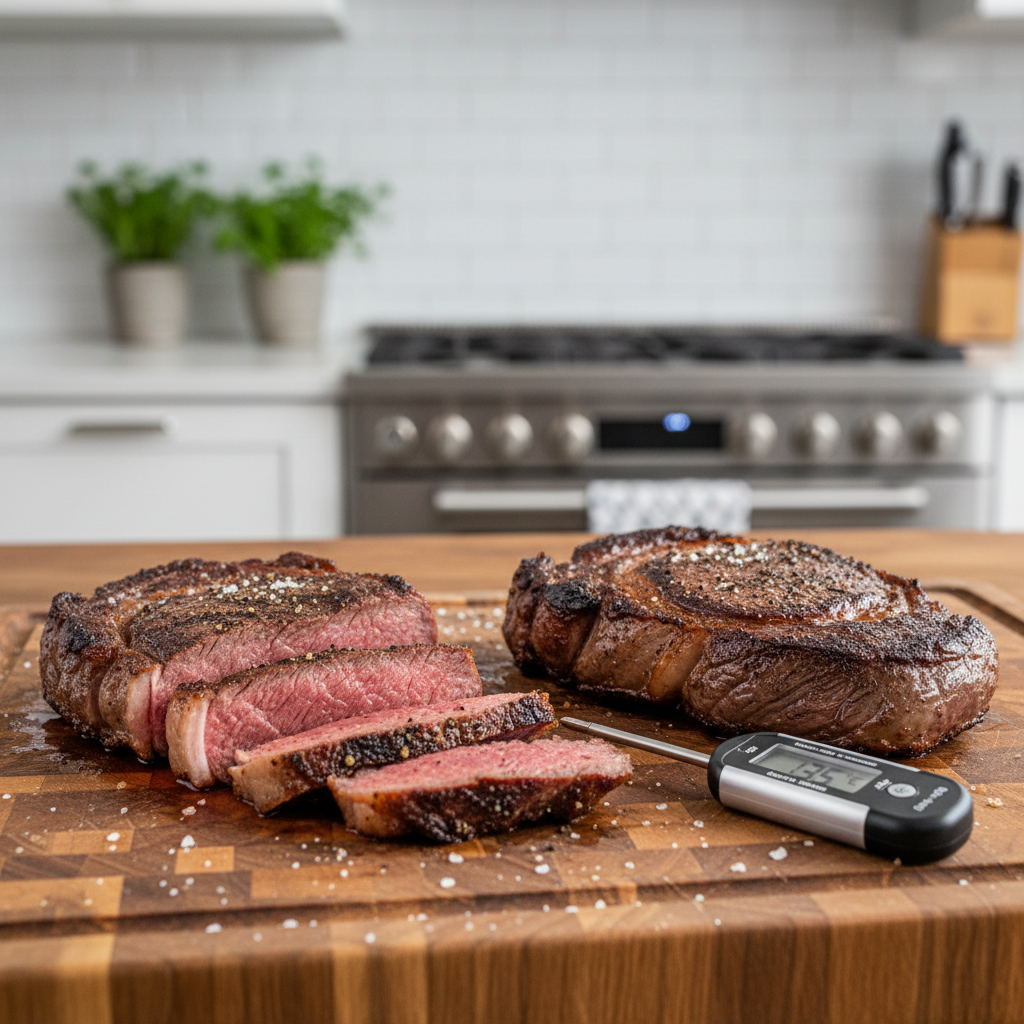
Medium rare is about internal temperature and texture: warm red-to-pink center, browned exterior, tender bite, and juices that stay mostly in the meat.
According to USDA Food Safety and Inspection Service, whole cuts of beef are generally considered safe when cooked to an internal temperature of 145°F and allowed to rest at least 3 minutes. Many cooks aim lower for medium rare, but safety needs vary by person, if you’re in a higher-risk group, consider talking with a healthcare professional about your comfort level.
In practice, a lot of “misses” happen because of carryover cooking, the steak keeps rising a few degrees after you pull it off heat, thicker steaks can climb more.
- Target pull temp for medium rare: usually 125–130°F
- Typical finish temp after resting: often 130–135°F
- Why it matters: pulling at 135°F often lands you in medium, especially with thicker cuts
Pick the right steak and thickness (your odds improve fast)
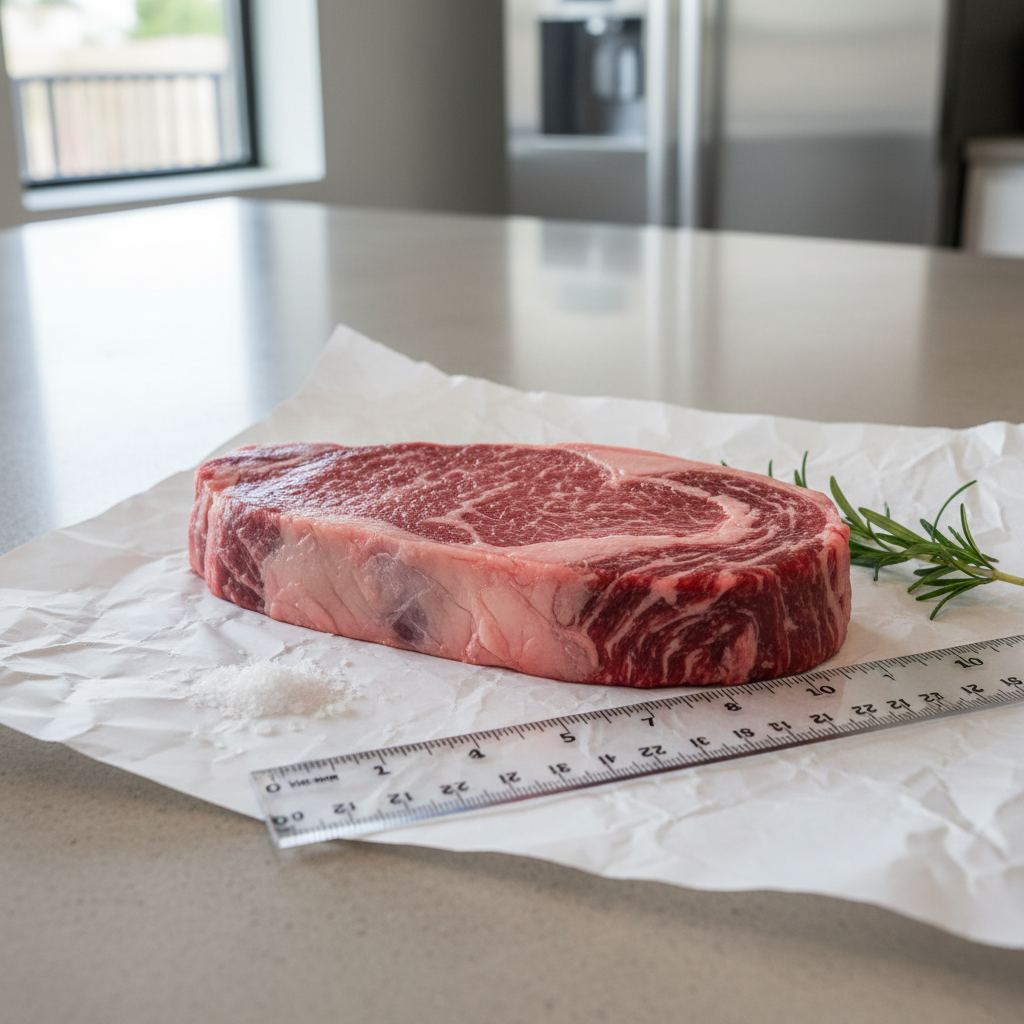
If your goal is consistent medium rare, thickness matters more than brand. Very thin steaks overcook quickly, you can still get tasty results, but the margin for error shrinks.
- Best thickness: 1.25 to 2 inches
- Great cuts for beginners: ribeye, strip steak, filet mignon
- Works but trickier: flank or skirt (often better cooked to medium, then sliced thin)
Marbling helps. A lean steak can hit medium rare and still feel a bit firm, that’s not failure, that’s the cut.
Prep that actually changes the outcome
Most “perfect medium rare” advice gets too fancy. At home, three prep moves do most of the work: dry surface, right salt timing, and tempering expectations about room temp.
Dry the surface for better browning
Pat the steak dry with paper towels. Moisture turns to steam, steam fights crust. If you have time, a short uncovered rest in the fridge helps the surface dry further.
Salt with intent
- Option A (best if you plan ahead): salt 45 minutes to overnight before cooking, uncovered in the fridge
- Option B (best if you’re cooking now): salt right before it hits the pan or grill
What to avoid is salting and waiting 5–30 minutes, it often pulls moisture out without enough time to reabsorb, leading to a wet surface.
Room temp: don’t overthink it
Letting steak sit out 20–30 minutes can take the chill off, but it won’t magically make the interior “even.” Your real lever is still heat management and a thermometer.
Medium rare temperature chart (use this like a map)
Here’s a quick table you can keep in your head. Use it to decide when to pull, and to label what you’re seeing when you slice.
| Doneness | Pull Temp (°F) | Finish After Rest (°F) | Center Color / Texture |
|---|---|---|---|
| Rare | 118–122 | 122–128 | Cool red, very soft |
| Medium rare | 125–130 | 130–135 | Warm red/pink, tender, juicy |
| Medium | 135–140 | 140–145 | Pink, firmer bite |
| Medium well | 145–150 | 150–155 | Faint pink, noticeably firm |
| Well done | 155+ | 160+ | Brown throughout, drier |
Key point: measure in the thickest part, and avoid touching bone or the pan, those spots read hotter than the true center.
Method 1: Pan-sear + optional butter baste (most consistent indoors)
For most home kitchens, pan-searing is the easiest way to learn how to cook steak medium rare perfect because you can control the heat in small adjustments.
What you need
- Heavy skillet (cast iron works well)
- High smoke point oil (avocado, canola, grapeseed)
- Instant-read thermometer
- Optional: butter, garlic, thyme/rosemary
Step-by-step
- Heat the pan: medium-high until the oil shimmers, not smoking aggressively
- Sear first side: place steak, press lightly for full contact, leave it alone 2–4 minutes depending on thickness
- Flip: cook the second side another 2–4 minutes
- Check temp early: start checking once you think you’re within 10°F of target pull temp
- Optional baste: lower heat to medium, add butter and aromatics, tilt pan and spoon butter over steak for 30–90 seconds
- Pull at 125–130°F: for medium rare, then rest
If your crust looks good but the center lags behind, move the steak to a lower-heat zone of the pan or finish in a low oven. That’s not cheating, it’s control.

Method 2: Grill medium rare without drying it out
Grilling adds flavor fast, but the heat can be uneven, especially with flare-ups. The win is learning to use two-zone heat.
Set up two zones
- Gas grill: one side high, one side medium-low or off
- Charcoal: coals stacked on one side, empty on the other
Step-by-step
- Preheat and clean grates: a hot, clean grate reduces sticking
- Sear over hot zone: 1–3 minutes per side, lid down if heat is strong and steady
- Move to cooler zone: bring the center up gently, check temperature periodically
- Pull at 125–130°F: then rest 5–10 minutes
Flare-ups happen. When they do, move the steak off direct heat rather than fighting the flames, burned fat tastes bitter and masks beef flavor.
Fast self-check: why your medium rare keeps missing
If you feel like you “do the same thing” but the doneness jumps around, it’s usually one of these.
- No thermometer: timing alone ignores thickness, starting temp, and heat intensity
- Pan not hot enough: you cook longer to get color, center overshoots
- Pan too hot the whole time: thick gray band, outside toughens before center warms
- Skipping rest: you slice early, juices leave, texture feels drier
- Thin steak: medium rare window is seconds, not minutes
Quick test: next cook, write down thickness and pull temperature. If results improve immediately, your issue was feedback, not skill.
Resting, slicing, and serving (where “juicy” is decided)
Resting sounds boring, but it’s the difference between a steak that eats moist and one that “looks right” but feels dry. Put the steak on a plate or rack, loosely tent with foil if your kitchen is cold, then wait.
- Rest time: 5 minutes for smaller steaks, 8–12 minutes for thicker cuts
- Slice direction: cut against the grain, especially for strip and flank
- Finish: a pinch of flaky salt right before serving can wake up flavor
If you’re adding a sauce, add it after slicing or serve on the side, you worked for that crust.
Common mistakes (and the fixes that actually work)
- Mistake: flipping repeatedly because you’re nervous
Fix: let the crust form, then flip with purpose, one flip is enough for most steaks - Mistake: using pepper too early on very high heat
Fix: pepper right before cooking is usually fine, but if it burns on your setup, add pepper after searing - Mistake: cutting to “check doneness” mid-cook
Fix: rely on temperature, you can always cook more, you can’t uncut - Mistake: chasing perfect grill marks over even doneness
Fix: prioritize internal temp, marks are a bonus
Key takeaways and a simple next cook plan
If you want how to cook steak medium rare perfect to feel repeatable, stop negotiating with time and start cooking to temperature, it’s the cleanest shortcut.
- Buy thicker: 1.25–2 inches gives you control
- Dry and salt well: better crust, better flavor
- Pull at 125–130°F: rest until it coasts into the medium rare zone
- Use two-zone heat: on grill or in pan plus lower heat finish
Next time, pick one method, track thickness and pull temp, and adjust just one variable, that’s how you dial it in without feeling like you’re gambling dinner.
Action step: if you don’t own an instant-read thermometer, make that your one upgrade, it pays for itself in fewer overcooked steaks.