
how to make samosa crispy easy usually comes down to three things you can actually control at home: the dough texture, how you seal and rest the triangles, and the temperature strategy you use to fry or bake.
If your samosas turn soft after a few minutes, or the crust gets tough instead of flaky, you are not alone. The “crispy” part is less about a secret ingredient and more about a couple of small choices that stack up, like using the right fat in the dough and not rushing the fry.
This guide keeps it practical for a U.S. kitchen, with options for deep frying, air frying, or baking. I’ll also call out the common traps that waste time, like adding too much water to the dough or sealing with a wet edge that steams the shell.
What “crispy samosa” really means (and what usually goes wrong)
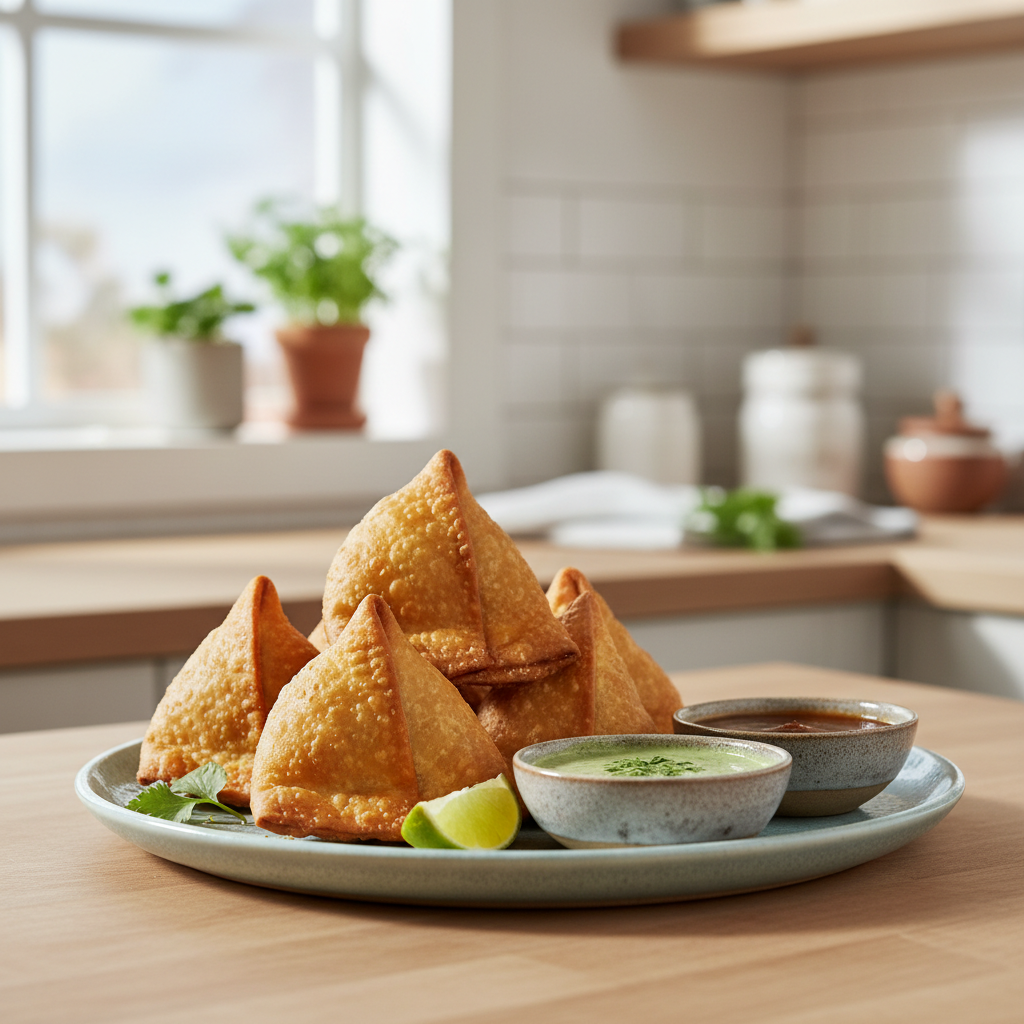
A crispy samosa shell is thin, dry on the surface, and shatters lightly when you bite, without tasting oily. Many home batches fail for reasons that feel small but matter a lot.
- Dough too wet: extra water makes gluten develop fast, and the shell turns bready or chewy instead of flaky.
- Oil too hot at the start: the outside browns fast while the inside stays undercooked, then it softens as steam tries to escape.
- Overfilling: more filling means more internal moisture, which pushes steam into the crust and kills crunch.
- Weak seal: even a tiny leak lets oil in and moisture out in the wrong way, leading to greasy patches.
- No rest time: skipping dough rest and shaped-samosa rest often creates bubbles in odd spots and uneven crisp.
According to USDA Food Safety and Inspection Service (FSIS)... hot foods should not sit for long periods at room temperature, so if you are making a big batch, plan a quick serve window or keep them hot in a low oven rather than leaving them on the counter.
Ingredients that drive crispiness (simple, not fancy)
For how to make samosa crispy easy, start with a dough that is intentionally stiff and lightly coated in fat. That fat creates “layers” as the dough fries, which reads as flaky crisp.
Basic dough ratio (home-friendly)
- All-purpose flour
- Oil or ghee (fat rubbed into flour)
- Salt
- Water (added slowly)
In U.S. supermarkets, neutral oils work well. Ghee gives a more classic aroma but can be pricier, both can make a crisp shell if you keep the dough firm.
Filling choices that keep the shell crunchy
- Keep it dry: cook potatoes until moisture evaporates, and cool filling fully before stuffing.
- Go easy on watery add-ins: fresh onions, tomatoes, or very wet chutneys inside often soften the crust.
- Use starch to your advantage: peas, potatoes, and paneer tend to behave better than very juicy proteins.
Quick self-check: which crispiness problem do you have?
If you diagnose the issue first, the fix becomes obvious, and you stop changing five variables at once.
| What you see | Most likely cause | What to change next time |
|---|---|---|
| Soft after 10 minutes | Steam trapped, filling too hot or wet | Cool filling, reduce moisture, vent on rack |
| Hard/tough crust | Dough too dry or overworked, hot fast fry | Mix gently, rest longer, start with lower oil temp |
| Greasy patches | Oil not hot enough or seal leaking | Maintain temp, seal firmly, don’t crowd pan |
| Big blisters, uneven color | Oil too hot early, dough not rested | Lower initial temp, rest dough and shaped pieces |
Key takeaway: If the shell is oily, your oil is usually too cool; if the shell is pale but tough, your process is often too hot too soon.
Step-by-step: how to make samosa crispy easy (dough, fill, fold)
This is the part that decides your texture before any heat touches the samosa.
1) Make a stiff, lightly layered dough
- Mix flour and salt, then rub in oil or ghee until it looks like coarse sand and holds shape when pinched.
- Add water slowly, stopping as soon as the dough comes together. It should feel firm, not soft.
- Knead briefly until smooth, then rest 30–45 minutes covered.
That rest makes rolling easier and helps prevent random bubbling. Many home cooks skip it, then wonder why the crust looks rough.
2) Cook and cool the filling
- Sauté spices, add potatoes and peas, cook until the pan looks dry rather than stewy.
- Spread filling on a plate to cool faster, then fill only when it feels room temp.
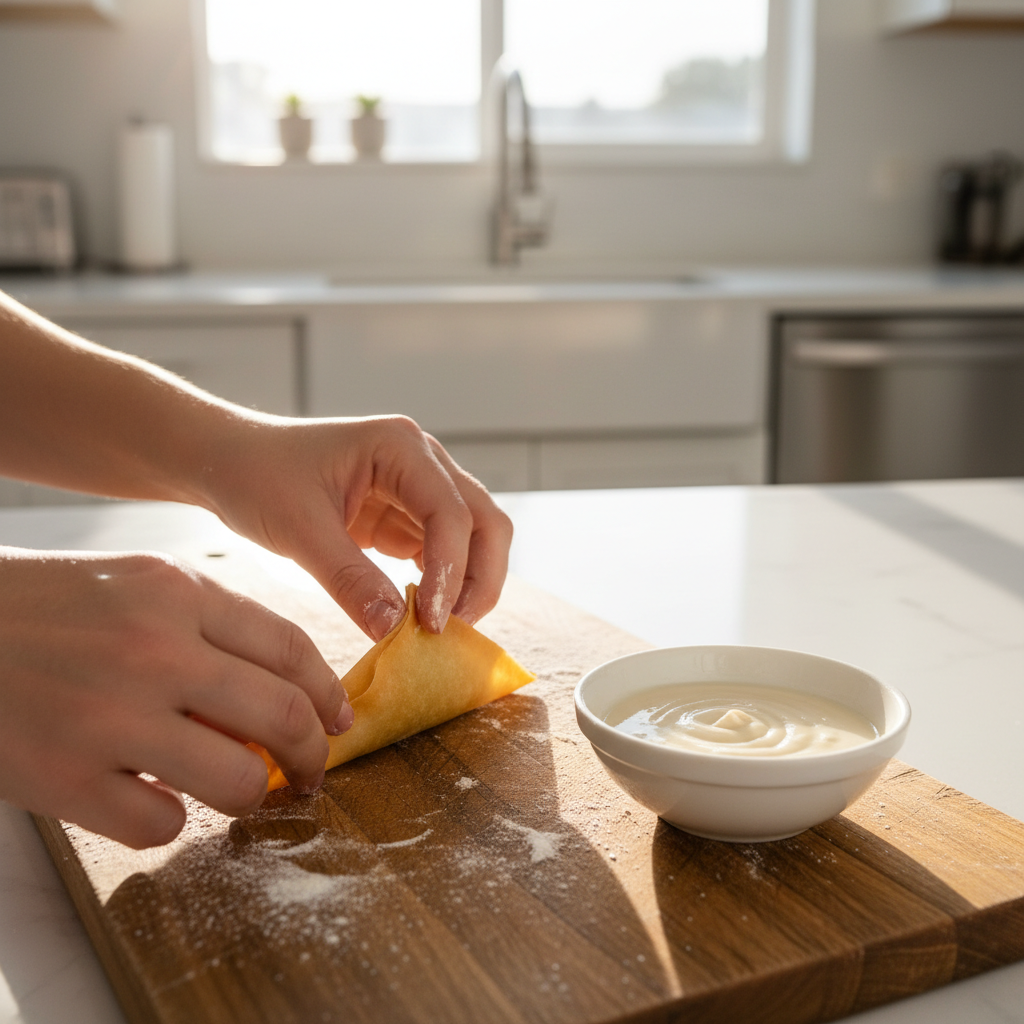
3) Roll, portion, and fold with a strong seal
- Roll dough thin but not paper-thin, then cut into circles or make a log and slice portions.
- Use a simple flour-and-water paste for sealing, applied lightly.
- Don’t overfill, a compact triangle crisps more evenly than a bulging one.
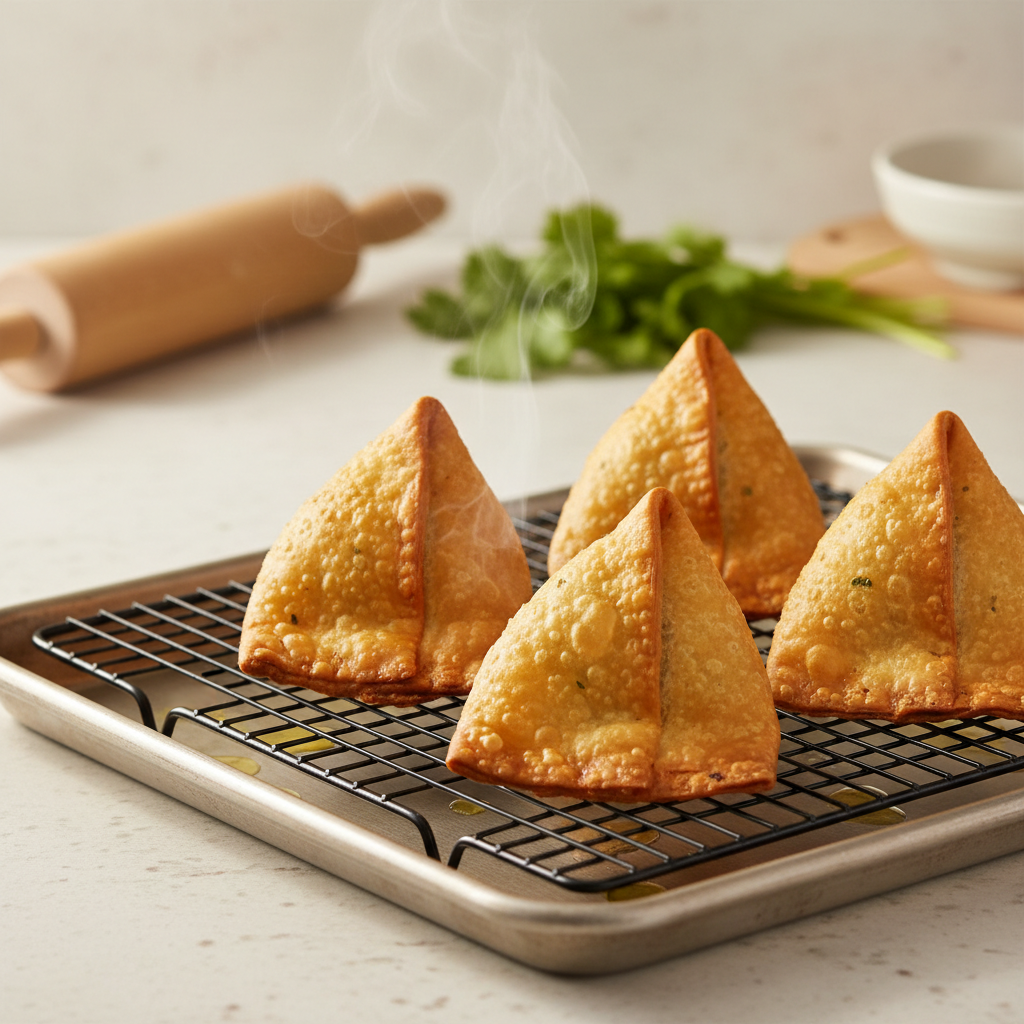
Mini-tip that saves batches: After shaping, rest the samosas 10–15 minutes on a tray so the surface dries slightly, that alone can improve crunch.
Cooking methods compared: deep-fry vs air-fry vs bake
You can get a crisp shell with any of these, but the “classic” blistered texture is easiest with oil. Air fryer and oven versions can still be very crunchy if you manage surface dryness and a light oil coating.
Deep frying (most traditional crunch)
- Use a pot with enough oil so samosas float freely, crowding drops temperature fast.
- Start on medium heat so the shell cooks through, then raise heat near the end for color.
- Drain on a wire rack, not paper towels, paper traps steam underneath.
Air frying (good crunch, lighter feel)
- Brush or spray a thin, even coat of oil on all sides, dry patches tend to go floury.
- Cook in a single layer with space, flip halfway.
- If they look dry but not crisp, add a second light oil mist and finish a few minutes more.
Baking (works, but needs technique)
- Use a hot oven and preheated sheet pan if possible, that initial heat jump helps crisp.
- Brush with oil or melted ghee for better browning.
- Rotate the tray once for even color, many ovens have hot spots.
Whichever method you choose, internal steam is the real enemy. Your job is to cook the crust through and let moisture escape without soaking the shell.
Practical crispiness hacks that feel “too simple” but work
These are the small moves people ignore because they sound boring, and then they keep chasing a new recipe instead.
- Cool filling fully: warm filling creates condensation inside the shell almost immediately.
- Dry the surface: shaped samosas resting uncovered for a short time often fry up cleaner.
- Keep seams tight: press edges firmly and avoid excess seal paste, wet seams steam.
- Use a rack after cooking: airflow keeps the bottom crisp.
- Re-crisp correctly: oven or air fryer beats microwave for leftover texture.
Common mistakes (so you don’t waste another batch)
Most “not crispy” samosas are actually a moisture problem or a temperature problem dressed up as a recipe problem.
- Microwaving to keep warm: it steams the crust and turns it soft fast.
- Adding too much flour while rolling: raw flour patches can taste chalky and prevent even browning.
- Skipping rest because you’re in a hurry: the dough fights back, thick spots stay chewy.
- Frying from frozen without adjusting: frozen samosas often need lower initial heat and more time to avoid dark outsides and underdone seams.
- Assuming darker equals crispier: overbrowning can taste bitter and still go soft as it cools.
If you are testing changes, change one variable per batch, like dough hydration or fry temperature pattern, otherwise you won’t know what actually fixed it.
When you may want extra help (or a simpler path)
If you have consistent issues despite following the core steps, your stove heat control or thermometer accuracy may be the hidden factor. A simple clip-on thermometer can help, and if you cook for someone with dietary restrictions, allergies, or a medical nutrition plan, it’s smart to consult a qualified professional for ingredient swaps.
For safety, handle hot oil carefully, keep kids and pets away from the pot, and avoid adding wet items into oil, splatter risk goes up fast. According to FDA... food safety guidance emphasizes safe handling and proper cooking practices, so if you are prepping ahead, cool fillings promptly and store them refrigerated.
Conclusion: your “crispy” checklist for the next batch
how to make samosa crispy easy is less mystery than discipline: a firm dough with fat rubbed in, a dry cooled filling, a tight seal, and a cooking method that respects temperature and steam.
Pick one method you can repeat, deep fry, air fry, or bake, then run the same checklist every time. If you want one action step today, make the filling first and let it cool while the dough rests, that single timing change often improves crunch more than any spice tweak.
If you are cooking tonight, set a wire rack on a sheet pan now, you’ll thank yourself when the first batch stays crisp while the second batch finishes.